How to fix the DNS_PROBE_STARTED Error
DNS_PROBE_STARTED is one of the most common errors you may encounter while accessing the internet.
The error can be frustrating as it prevents you from accessing websites and can disrupt your online activities. But, the Domain Name Server (DNS) problem is nothing to panic about. You can use a handful of relatively easy, quick, and straightforward solutions to resolve the issue and get back to a smooth browsing experience.
In this blog post, we will learn what the DNS_PROBE_STARTED error is, its common causes, and the steps to resolve it.
What is DNS_PROBE_STARTED Error?
The DNS_PROBE_STARTED error generally indicates an issue with your DNS or network. It means that your system was unable to connect to a DNS server.
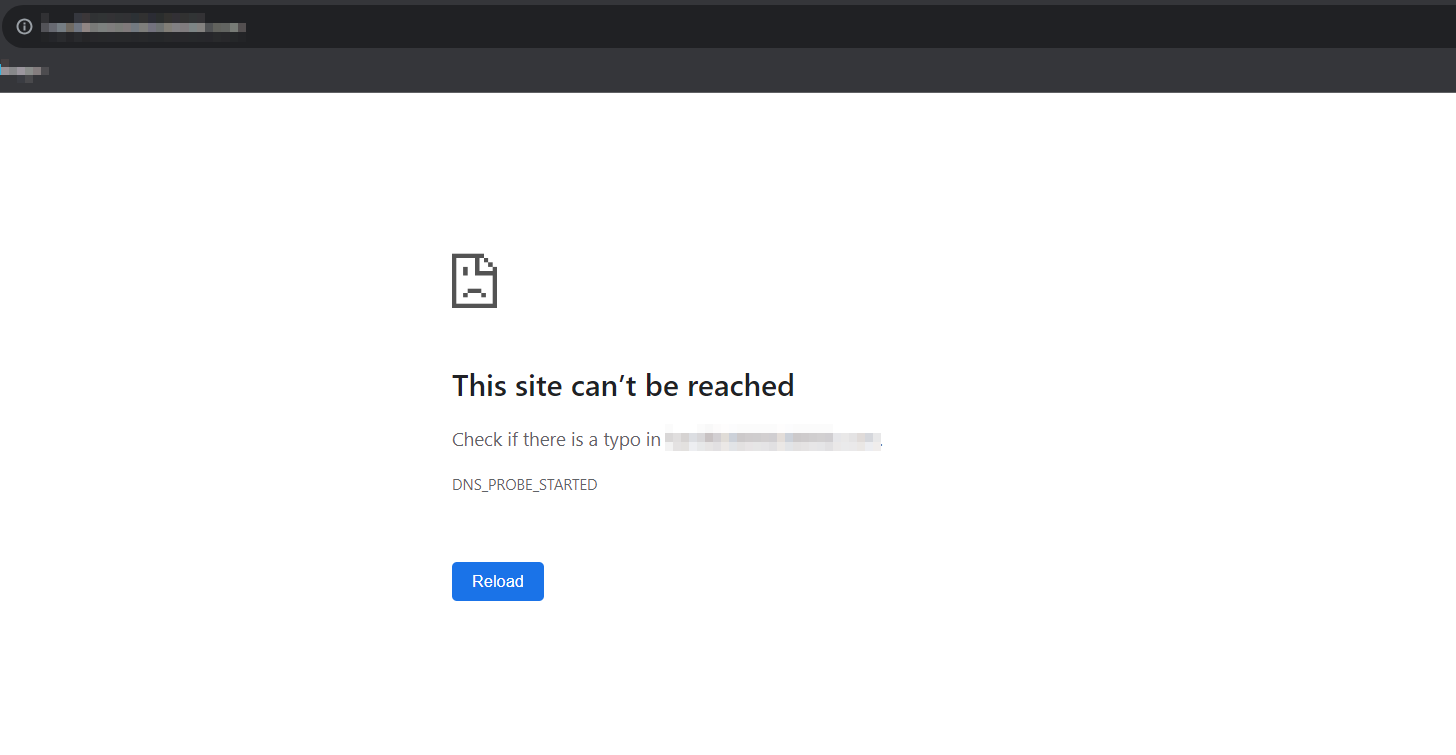
THE DNS_PROBE_STARTED error is a common issue in web browsing. It occurs when your web browser cannot establish a connection with the DNS server. The DNS server translates human-readable domain names (ABC.COM) into IP addresses (192.168.1.1). When your browser cannot resolve the DNS, it results in the “DNS_PROBE_STARTED” error.
Causes of DNS_PROBE_STARTED error
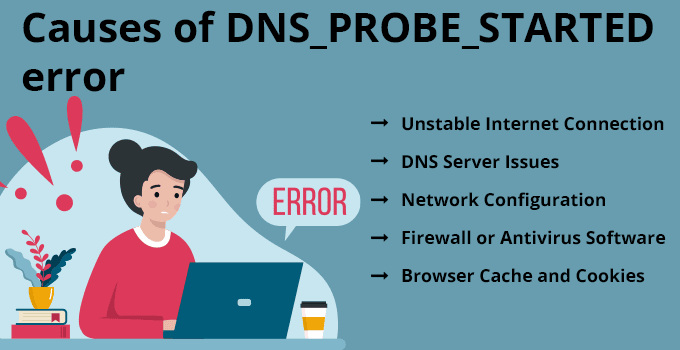
There are a few common causes of DNS_PROBE_STARTED error. Understanding the potential causes is crucial for effectively resolving the issue. Let’s check them out.
1) Unstable Internet Connection
If your internet is not stable, you may have DNS-related issues. When your internet is unstable, and you try to access any website, your browser will not be able to connect to the DNS server of that website, and as a result, you will see DNS errors. The error may be different based on your OS and browser.
2) DNS Server Issues
When you connect your system to the internet, your system will get the DNS records from your ISP (Internet Service Provider). Sometimes, the default DNS server your ISP provides may encounter an issue. In such cases, you may get a DNS_PROBE_STARTED error while browsing any website.
3) Network Configuration
Sometimes, you may have an issue with your system’s network configuration. Incorrect network settings on your system can lead to DNS errors. If you have misconfigured your network settings, you may encounter DNS errors while browsing the websites.
4) Firewall or Antivirus Software
Setting up Firewall and Antivirus applications is always a good practice. However, a strict firewall or antivirus rules can sometimes cause issues while browsing the websites. Some firewall or antivirus software may block DNS requests, resulting in errors.
5) Browser Cache and Cookies
Cached data in your web browser can also cause DNS errors. Also, stale or corrupt data might prevent proper DNS resolution. Also, never use outdated browsers while accessing any websites.
How to Fix DNS_PROBE_STARTED error
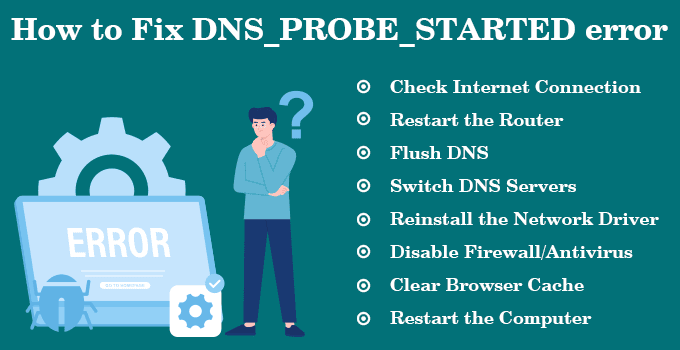
Now, we know what DNS_PROBE_STARTED error is and the common causes of the error. Are you ready to check out the common fixes to the issue? Let’s explore.
1) Check Internet Connection
First of all, make sure that your internet connection is stable. Try accessing other websites to verify that the issue is not related to a poor or intermittent connection.
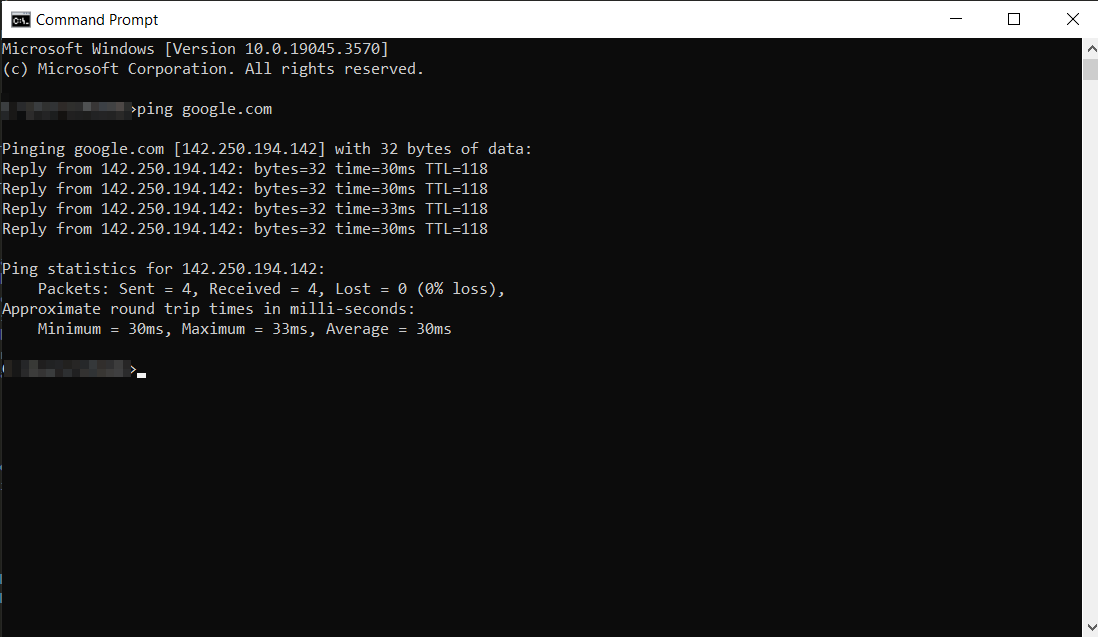
Another way to check an internet connection is to use the PING utility. Open the command prompt in your system and ping and remote host as shown in the following image:
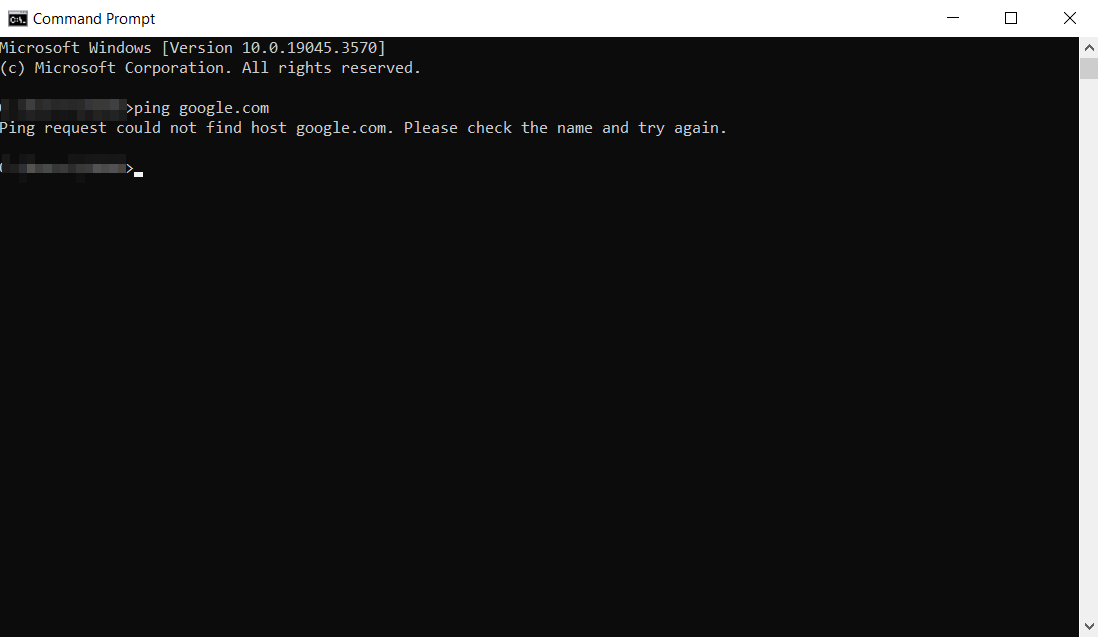
If your system doesn’t have an internet connection or if it is unstable, you will see the following output:
2) Restart the Router
Even if the internet works and you face the issue while browsing the websites, restart your router once. Unplug the power source, wait a minute, and then plug it back in. Restarting the router will flush the settings, and your issue may be resolved.
3) Flush DNS
DNS caching involves your OS/browser saving your recently visited IP addresses. However, an outdated saved entry can lead to network connectivity issues, such as the DNS_PROBE_STARTED error.
Hence, the next solution you should try to resolve the issue is to flush your DNS cache to refresh it. Open the command prompt in your system and run the following commands:
A) The following command will clear any incorrect DNS entries from your system’s cache:
ipconfig /flushdns
B) The following command will renew your system’s IP address:
ipconfig /renew
C) The following command will register your system’s DNS settings with your ISP:
ipconfig /registerdns
Now, try to access the website. If you are still facing the issue, try the following solutions.
4) Switch DNS Servers
Sometimes, the default DNS server your ISP provides may encounter these issues. Hence, you can manually change your DNS server settings to public DNS servers like Google DNS (8.8.8.8 and 8.8.4.4) or Cloudflare DNS (1.1.1.1). You can change it from your system’s network settings.
Windows:
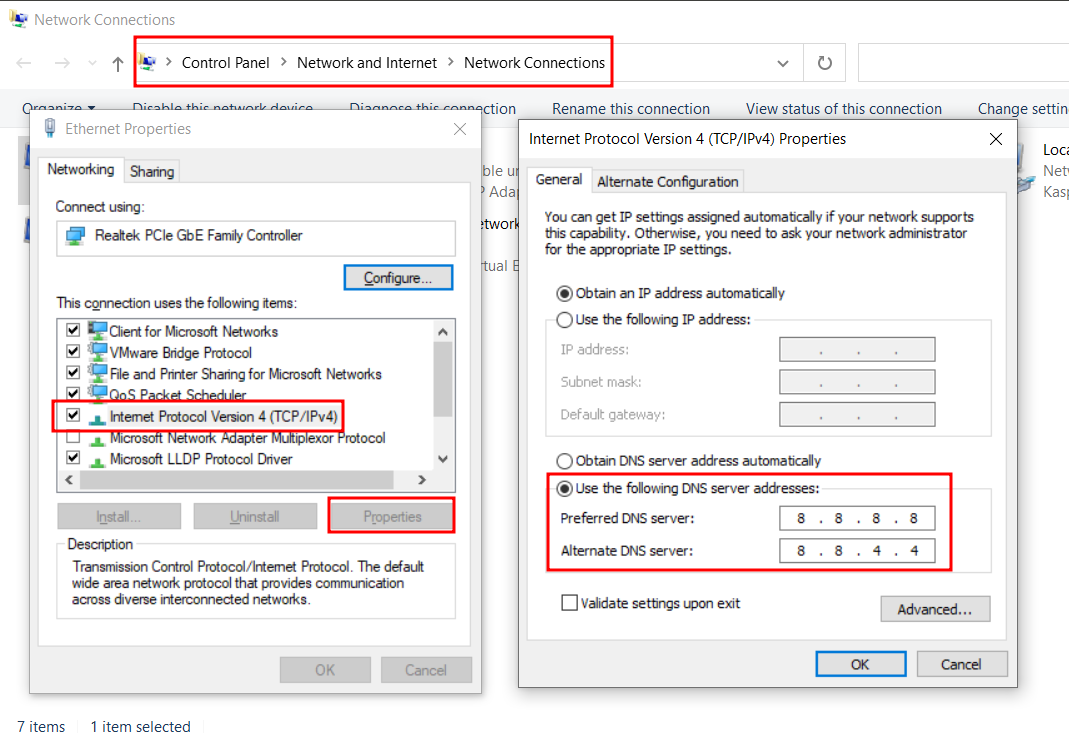
A) Open Control Panel ⇒ “Network and Internet” ⇒ “Network and Sharing Center” ⇒ “change adapter settings“.
B) Right-click on your Ethernet/Wi-Fi adapter and click on properties.
C) Click on “Internet Protocol Version 4 (TCP/IPv4)” and click on Properties.
D) Select “Use the following DNS server addresses” and enter “8.8.8.8“” for the Preferred DNS server and “8.8.4.4“” for the Alternate DNS server:
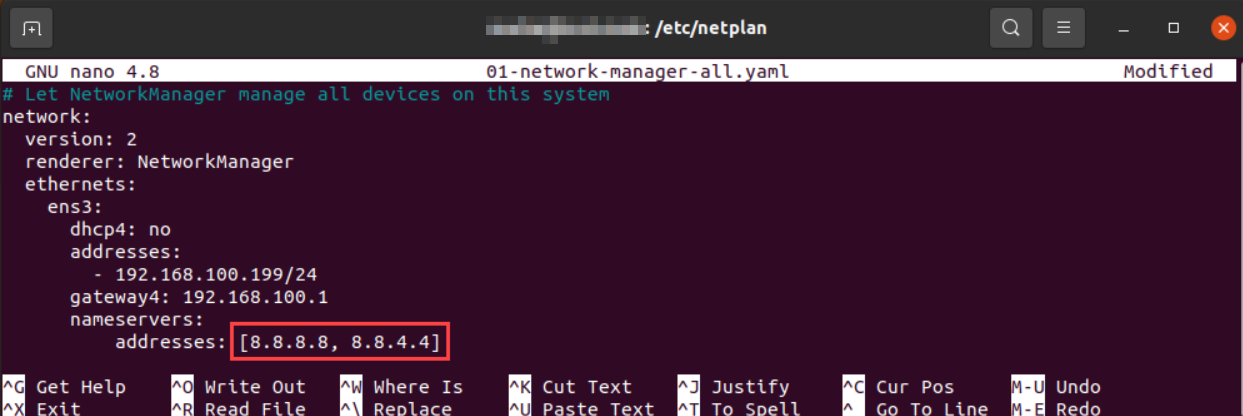
Linux:
A) Open Terminal and make sure that you are logged in as root
B) Navigate to /etc/netplan
C) Open 01-network-manager.yaml file with your favourite editor
D) Enter the DNS as shown in the following image:
5) Reinstall the Network Driver
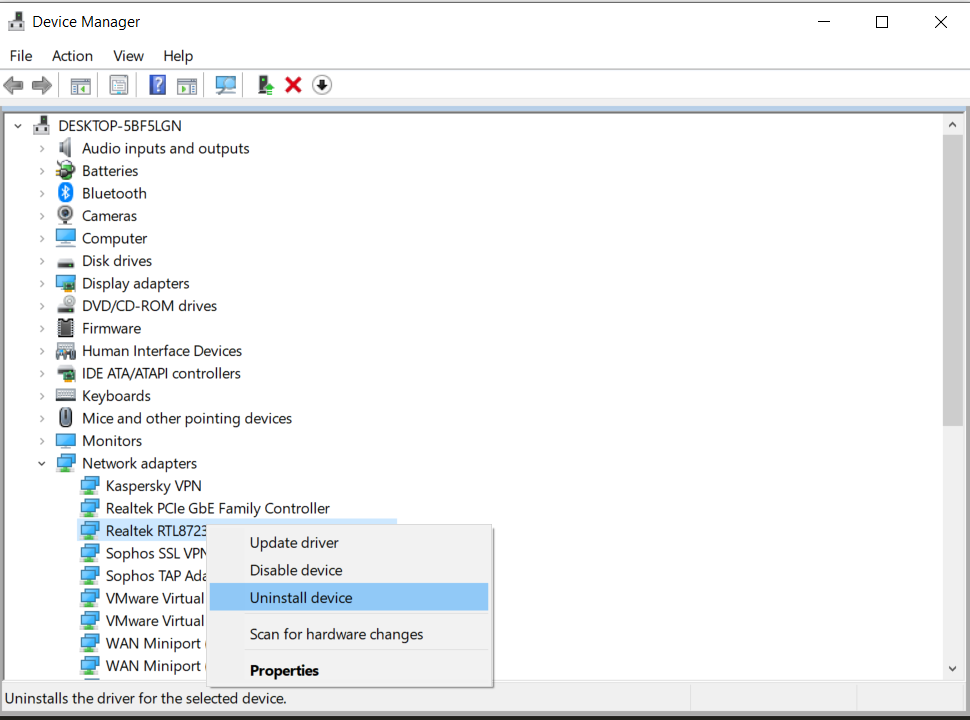
If your system has outdated network drivers, you may encounter issues. If you still get the error while browsing the website, you can try uninstalling and reinstalling your network drivers.
A) From your Windows system, press Windows + R. It will open the Run box.
B) Type devmgmt.msc to open Device Manager.
C) Right-click on Network Adapters and then click Uninstall device. Then, restart your system.
Once the system is up, go to Device Manager and select your Network Adapters. Click on Action ⇒ Scan for hardware changes.
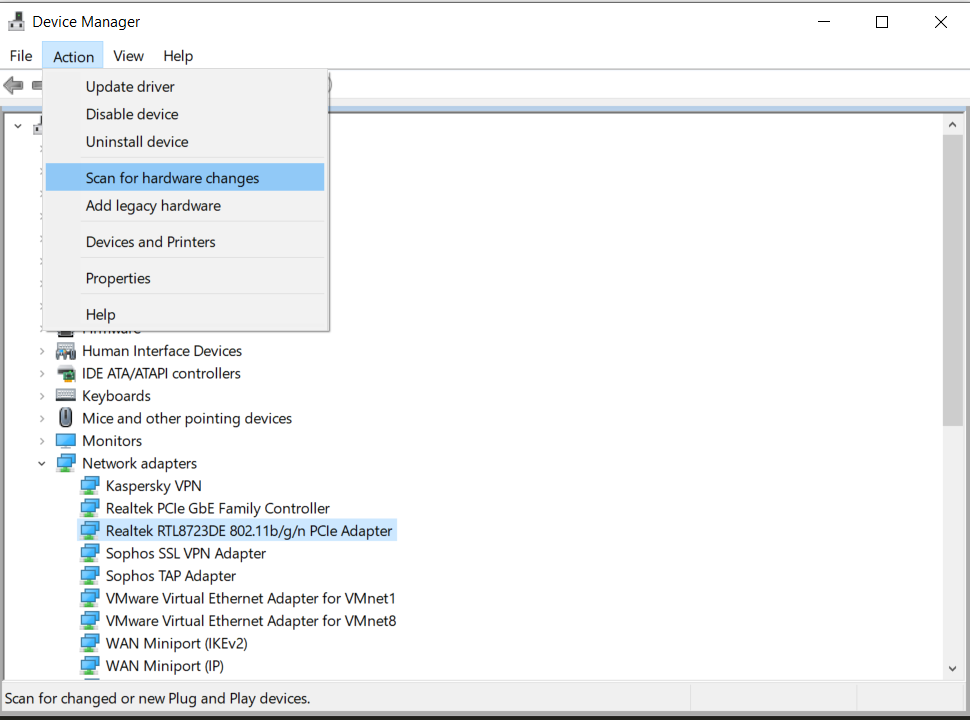
It will reinstall your network drivers. Now, try to access the website again.
6) Disable Firewall/Antivirus
Firewalls and Antivirus tools are crucial to safeguard your system against various issues, including malware. But, if you are still facing the DNS_PROBE_STARTED error after performing the above fixes, try disabling them temporarily.
If you can browse the website after turning off the firewall/antivirus, you can be sure they are the culprit.
Once you have found the root cause, you need to find which exact rule in the firewall/antivirus is blocking your access to HTTP requests and fix it.
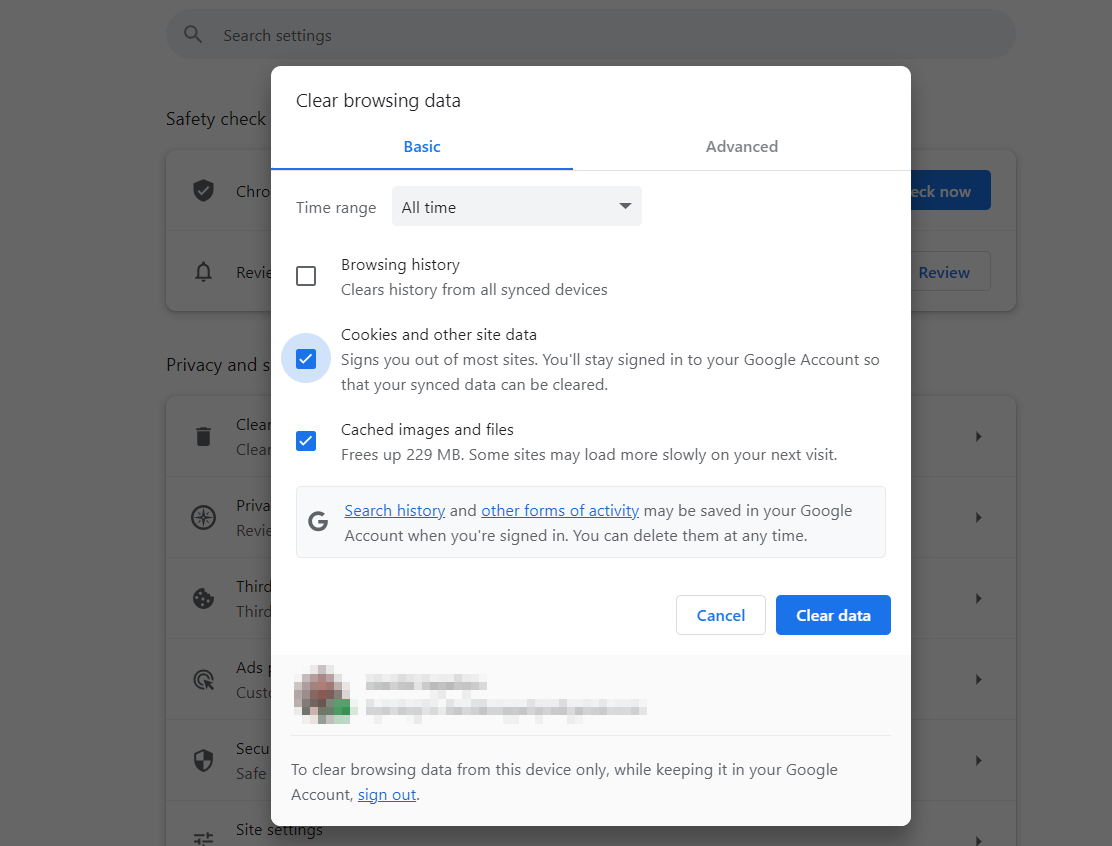
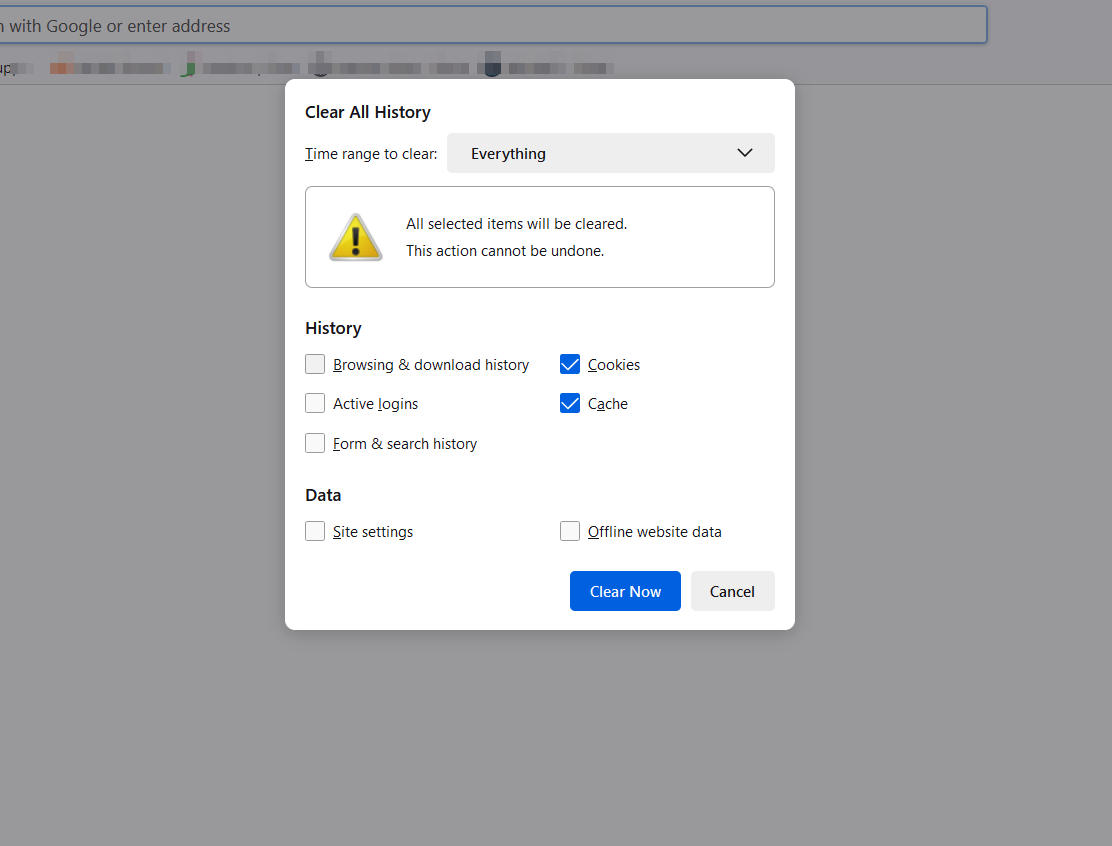
7) Clear Browser Cache
Sometimes, browser cache can cause issues with website browsing.
In most browsers, you can press the CTRL + SHIFT + DELETE key to open the Browsing data dialogue box. Select Cache and Cookie and then press on Clear Data.
Google Chrome:
Firefox:
8) Restart the Computer
A simple system restart can sometimes resolve various software-related issues, including DNS errors. Try restarting your system once and see if it helps.
Conclusion
Resolving DNS problems can be a real pain, especially if you don’t know what is causing the issue. However, if you now face the DNS_PROBE_STARTED error, you can easily apply the steps mentioned in this blog to fix it.
If you frequently face DNS issues for your website and want to switch to a web hosting provider, remember to contact us.


