How To Allow Ports In CSF Firewall Through SSH and WHM Panel?
Sometimes, It is required to open some ports in the firewall to run the applications. With VPS Hosting, we offer a CSF firewall on demand. If you have not requested the firewall while ordering, there is no need to open any ports. If you have installed any other firewall(except CSF) on your VPS Hosting, you need to refer to its manual to open ports and for configurable settings. In this article, we will learn how to allow ports in CSF firewall from SSH and Web Host Manager (WHM), as this is one of the uncomplicated processes.
Allow Ports In CSF Firewall Through SSH:
- Log in to your Linux server through SSH.
- Open the csf.conf file using any text editor.
- Add the port you wish to open in the file.
- Restart the CSF firewall for the changes to take effect using the below command.
nano /etc/csf/csf.conf
# Allow incoming TCP ports
TCP_IN = “20,443,465,21,22,587,993,25,53,80,110,143,995”
# Allow outgoing TCP ports
TCP_OUT = “20,21,443,587,22,25,80,110,43,53”
csf -r // To restart the CSF firewall
Allow Port In CSF Firewall Through WHM:
- Login to your WHM Panel.
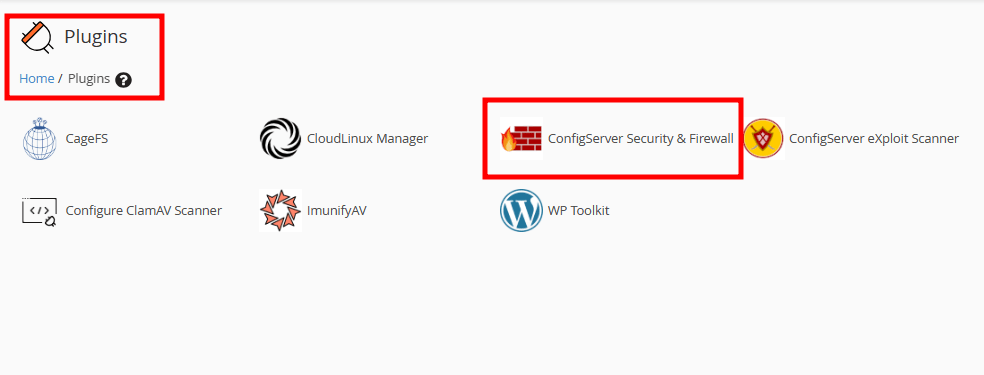
- Under the Plugins option, click the option ConfigServer Security & Firewall.
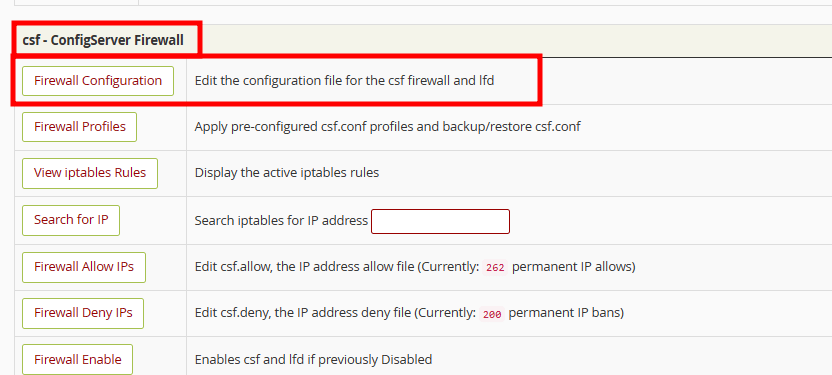
- On the new page, go to the Firewall Configuration button.
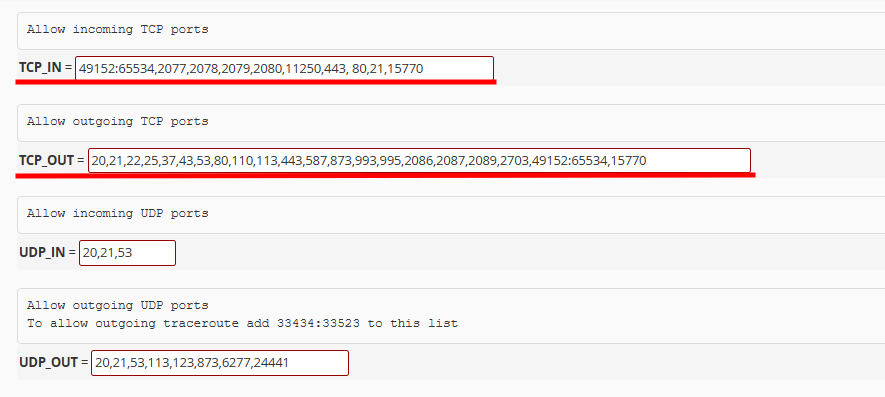
- Scroll down and locate Allow incoming TCP ports section. Enter the port you wish to open in the TCP_IN section. You can also add ports in TCP_OUT for the outgoing connection.
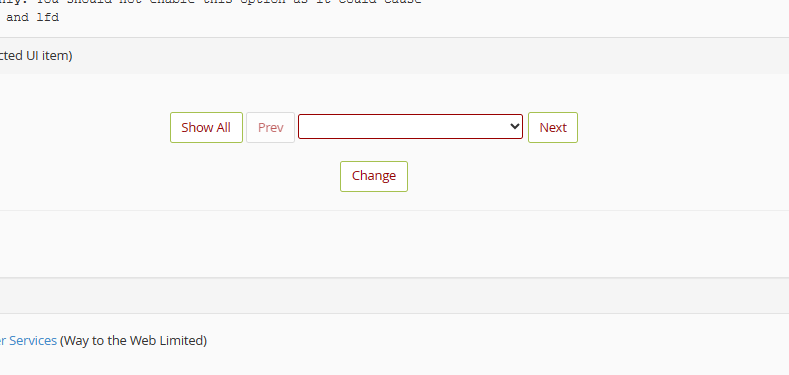
- Once complete, click the Change button at the bottom of the page to save your changes.
- You will get redirected to a new page to restart CSF. Restart CSF by clicking on the Restart csf+lfd button.
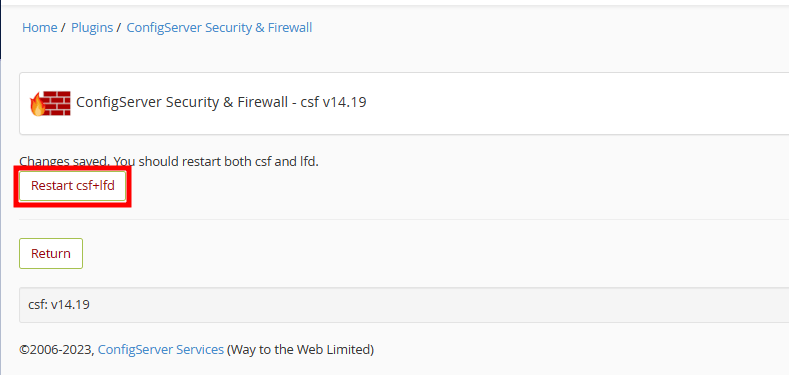
- Once the CSF restart process completes, you will receive a done message.
If you enjoyed this tutorial, then you would love our support! All Kemuhost hosting plans include 24/7 support from our amazing support team. Check out our web hosting plans and have your website migrated for free today!


