How to Install WordPress Using WPToolkit in cPanel?
What is the WP Toolkit?
WP(WordPress) Toolkit is a feature-rich WordPress management interface that allows you to handle complex tasks with ease. It allows you to install WordPress using WPToolkit in cPanel. You can manage your whole WordPress website from the WP Toolkit, like installing Plugins, Themes, Updates, Backup, and Restore your WordPress site.
Steps to install WordPress using WPToolkit in cPanel
- Login into your cPanel account.
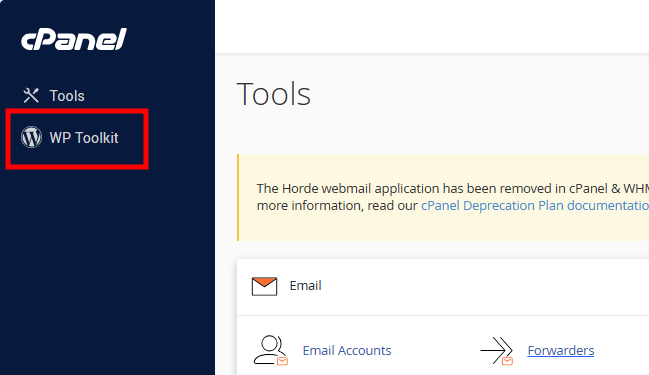
- Click on WP Toolkit on the left-hand side.
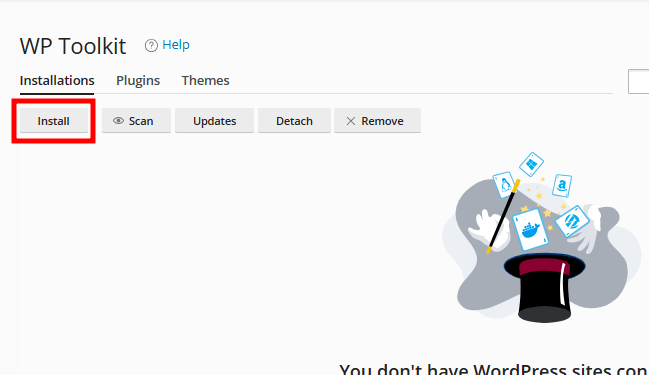
- On the new page, click Install.
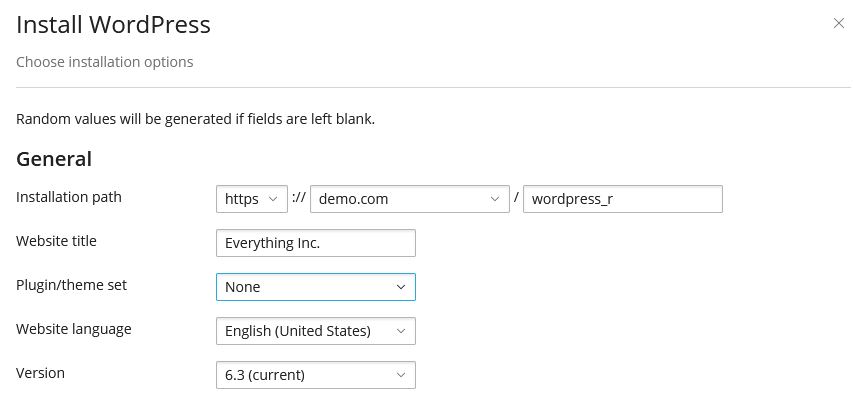
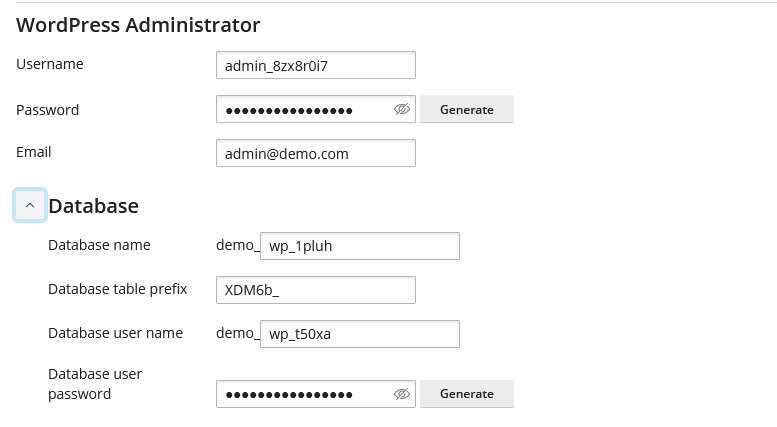
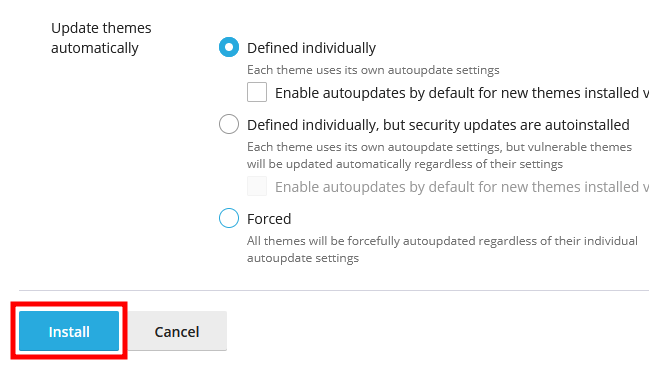
- In the Install WordPress page, fill in all the fields in General, WordPress Administrator, and Database.
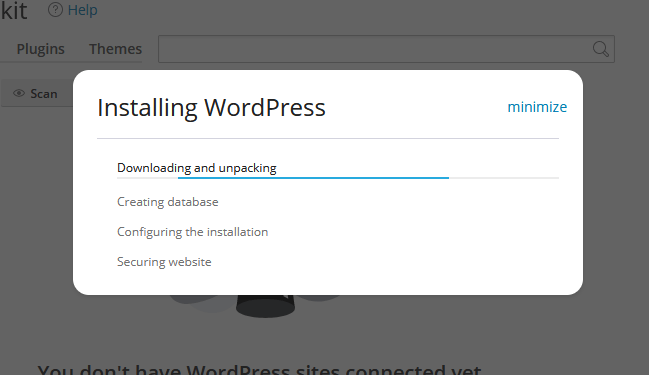
- Click on the Install button to finish the installation.
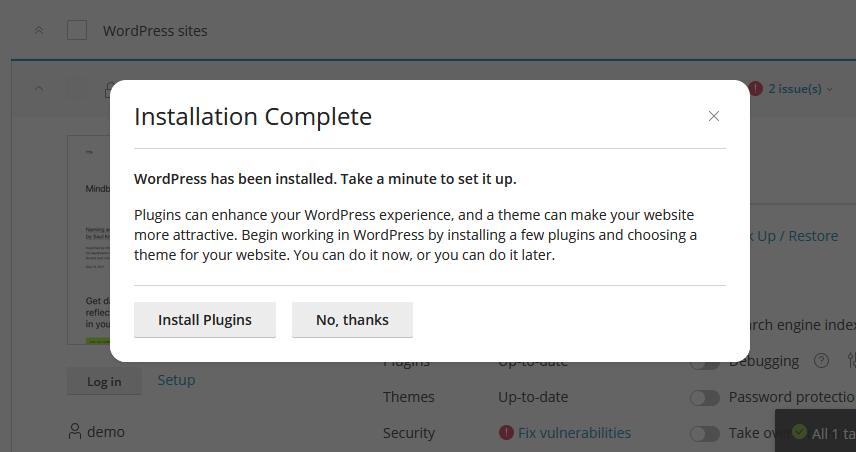
- Once the installation is complete, you will receive a pop-up message for confirmation. You can also start installing additional plugins for your WordPress installation.
Note: If any fields are left bank, random values are generated to fill up the fields.
Thats It! You can install and manage multiple WordPress sites in a few clicks.
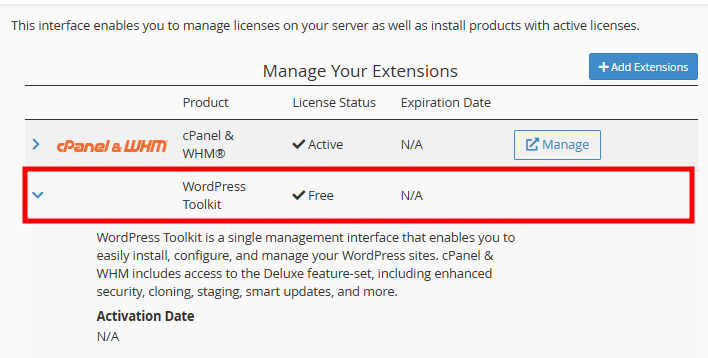
If WP Toolkit is not enabled, please follow the below steps to activate the WordPress Toolkit.
- Login into WHM as the root user.
- Under Server Configuration, select WHM Marketplace.
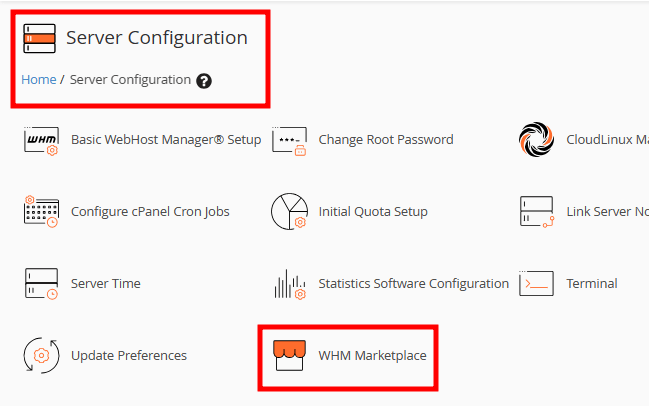
- On the new page, click on Enable next to WordPress Toolkit.
If you enjoyed this tutorial, then you would love our support! All Kemuhost hosting plans include 24/7 support from our amazing support team. Check out our web hosting plans and have your website migrated for free today!

How To Change Bandwidth Limit Of cPanel Account From WHM Server?
How To Change Primary Domain Of cPanel In WHM Server?
How To Access WHM Panel Without Root Password?
About Author
KemuHost Team
We are a team of Web Hosting Experts with decades of experience in Server Management and Web Hosting fields. We do perform thorough research on the web hosting trends and provide the best information to our users.