How To Activate AutoSSL Certificate In WHM for cPanel Users?
SSL is also known as Secure Sockets Layer. It is an encryption-based Internet security protocol. WHM provides free SSL certificates to cPanel users. Since it is an automated process by cPanel, there is no need to copy and paste the certificate. The main benefit of an Auto SSL Certificate is it will be renewed automatically on its expiration time. It also covers the sub-domains of the same cPanel user account. Let us go forward to the steps to activate AutoSSL Certificate in WHM.
Steps to activate AutoSSL Certificate?
- Log in to the WHM panel using as a root user.
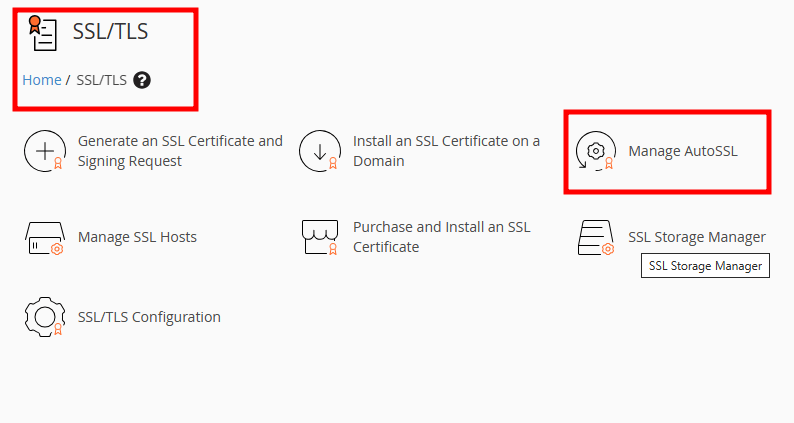
- Under the SSL/TLS, select Manage AutoSSL.
- Under the Providers section, you will see a list of free SSL providers. You can select anyone from Let’s Encrypt™ or Sectigo. Both have their pros and cons of their own. Select the provider and click on save at the bottom of the page.
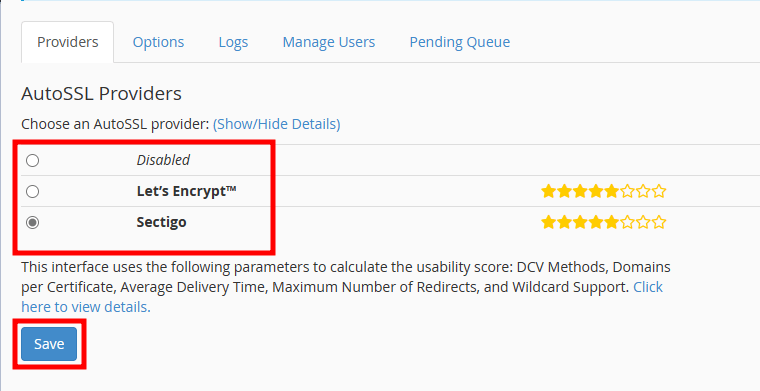
- It will allow the WHM to add the AutoSSL Package in Feature Manager. It will also set a cronjob to install and download the SSL Certificate for the hosted Domains.
- Under the SSL/TLS, select Manage AutoSSL.

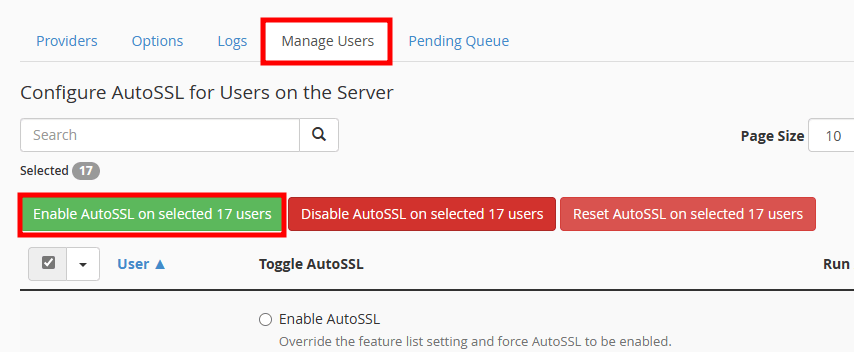
- On the new page, select ManageUsers.
- Select the cPanel users from the list for whom you want to enable AutoSSL. Once all the users are selected, click Enable AutoSSL on selected users button. It will add the selected users to the queue to install the Auto SSL Certificate.
- Click on the Logs tab to verify the Auto-SSL Logs for the users.
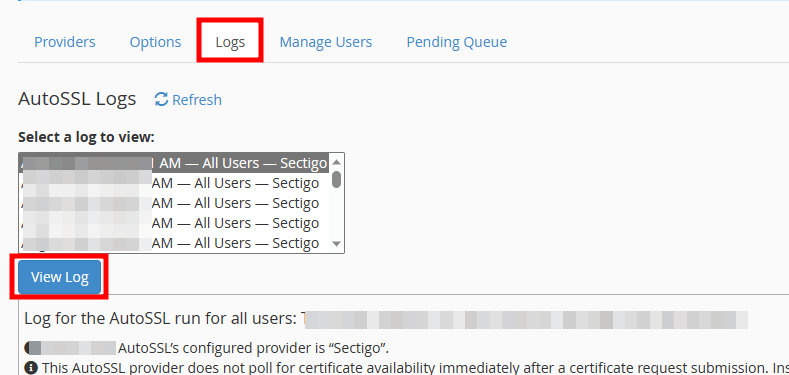
You can check the status of your AutoSSL Certificate from the Logs. The Log file can be for all users or the separate cPanel user. Select the log and click on the View Log button.
How to enable AutoSSL for cPanel users:
If you enjoyed this tutorial, then you would love our support! All Kemuhost hosting plans include 24/7 support from our amazing support team. Check out our web hosting plans and have your website migrated for free today!

