How To Add The MX Record In cPanel?
MX record stands for Mail Exchange which directs emails to a mail server. You need to point the MX record to your email service to run your email service. This article will assist you to change or add the MX record in cPanel.
Please refer to the below steps to add the MX record in cPanel:
- Login to your cPanel account.
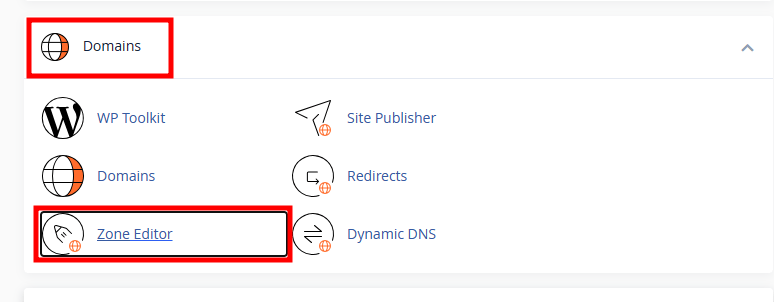
- Under the Domains section, click on the Zone Editor.
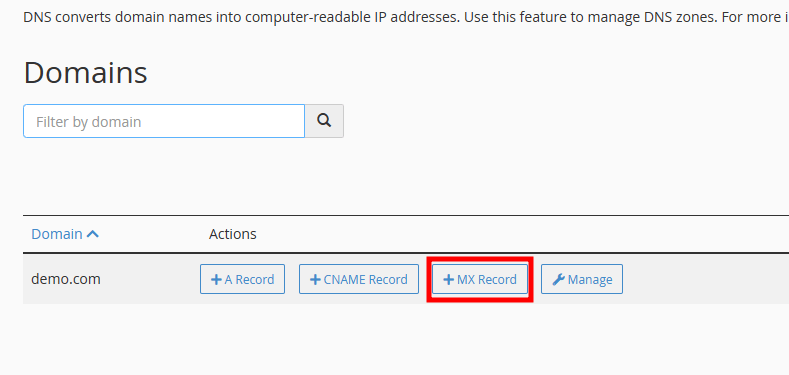
- If you do not have an MX record for the domain, click the +MX Record button.
- On the pop-up window, provide below details.
- Priority: The priority numbers before the domains for these MX records indicate preference; the lower priority value is preferred over the higher value.
- Destination: Fully qualified domain name(FQDN)
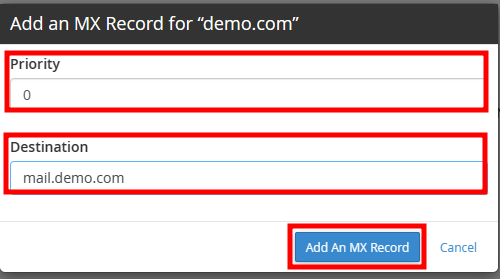
- Once done, click on Add An MX Record button.
Note: You must confirm the A record and CNAME record are already present for the domain.
The new MX record will take 2 to 6 hours to propagate globally.
Please refer below steps to edit MX record:
- Login to your cPanel account.
- Under the Domains section, click on the Zone Editor.

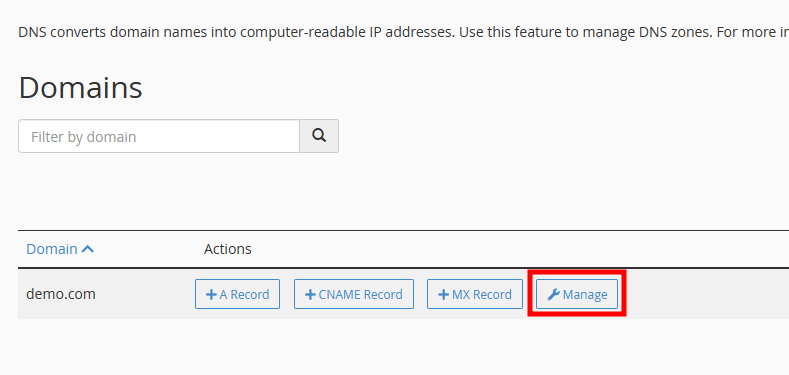
- At the zone editor, go to the domain you want to change the MX record and click the Manage button.
- On the new page, click the Edit button next to the MX record field of the domain.
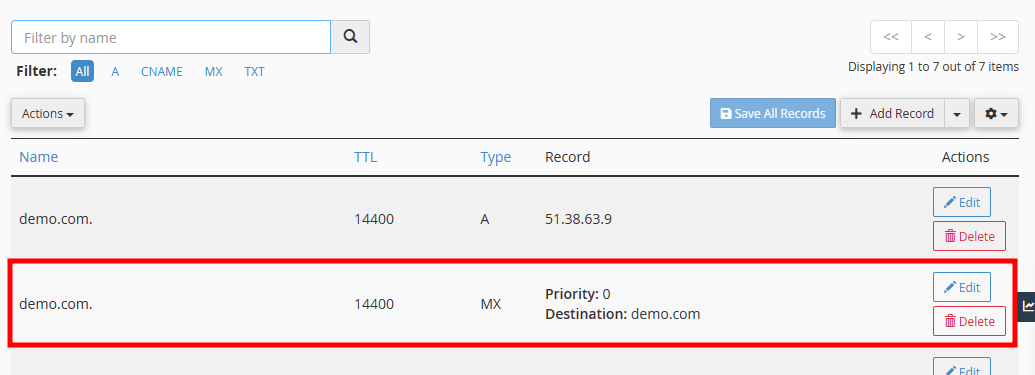
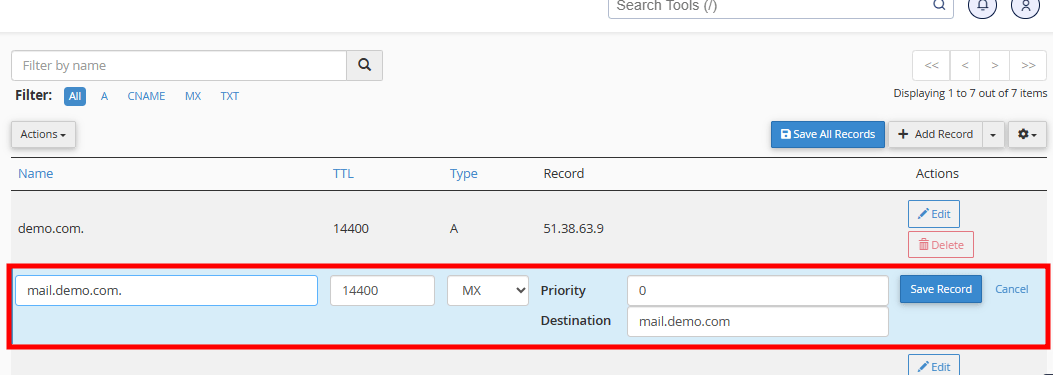
- In the priority field, add the required priority for your email server. Lowering the value gives higher chances to accept an email to your mail service. Enter the mail service record in the Destination field. Click on the Save Record button to save the changes.
- You will see a success message in the green pop-up.
Note: You must confirm the A record and CNAME record are already present for the domain.
If you enjoyed this tutorial, then you would love our support! All Kemuhost hosting plans include 24/7 support from our amazing support team. Check out our web hosting plans and have your website migrated for free today!


