How To Block WHM Server Access For Specific Countries?
The main benefit of blocking WHM server access for particular countries is to enhance the security of your server by reducing the risk of unauthorized access, brute force attacks, and other malicious activities originating from countries with a higher level of cybercrime.
Before we move forward to see how to block WHM server access for specific countries, ensure to enable the cPHulk function in your WHM panel, which is a built-in WHM function.
There are two ways to block WHM server access from specific countries.
- Using the cPHulk built-in function provided by the WHM server
- Using CSF Firewall
Block WHM Server Access With CPHulk Function
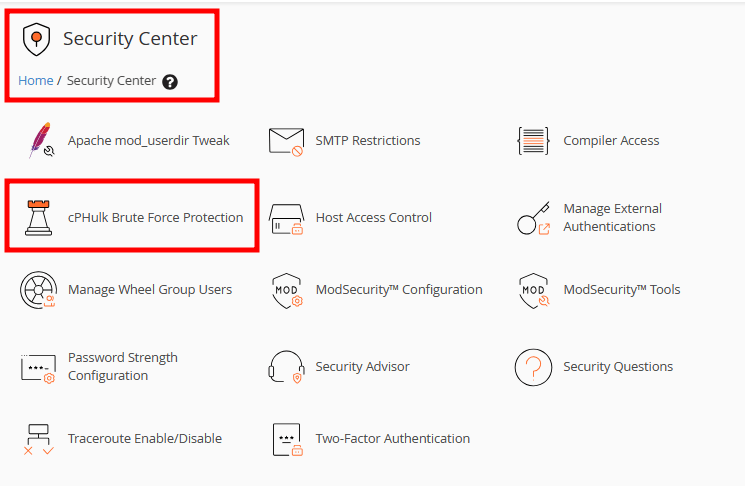
- Login to WHM Panel as the root user.
- Under the Security Center, select cPHulk Brute Force Protection.
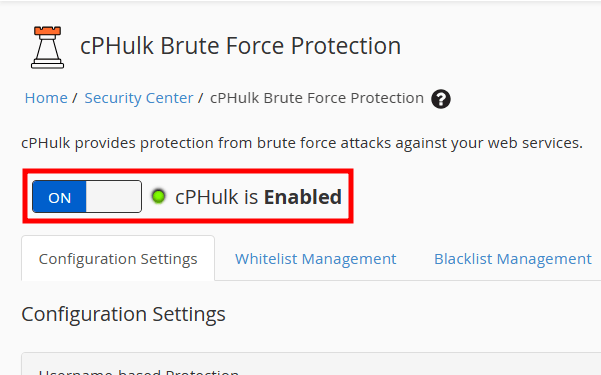
- If the cPHulk function is disabled, click to enable it for your VPS.
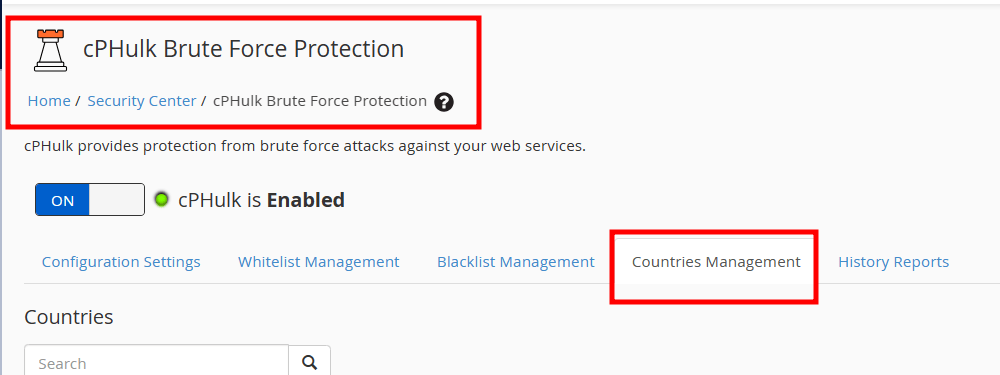
- Once you enable this function, you will see multiple options and settings to protect your WHM server. Select Countries Management tab.
- Select the countries you want to block from the checkbox. Once you have selected all the countries you want to blacklist, click the gear icon on the right of the list. Select the option Blacklist Selected Countries from the options provided.
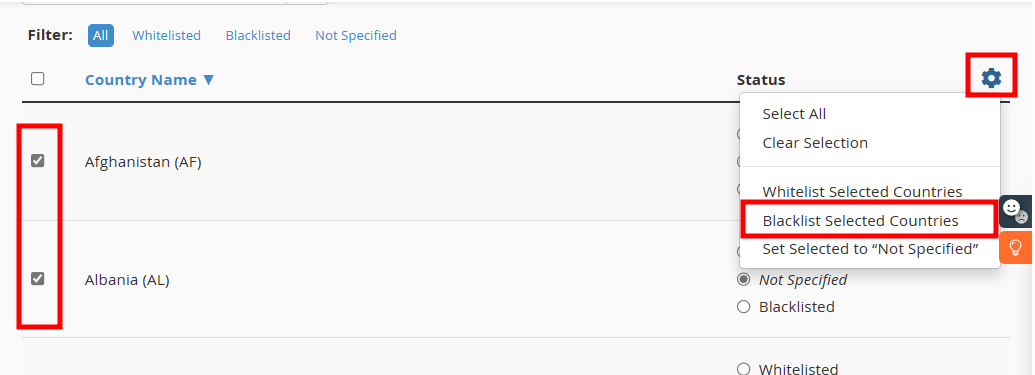
Note: You can also search the country name in the search field at the top of the list and select Blacklisted from the radio button on the right side of the page.
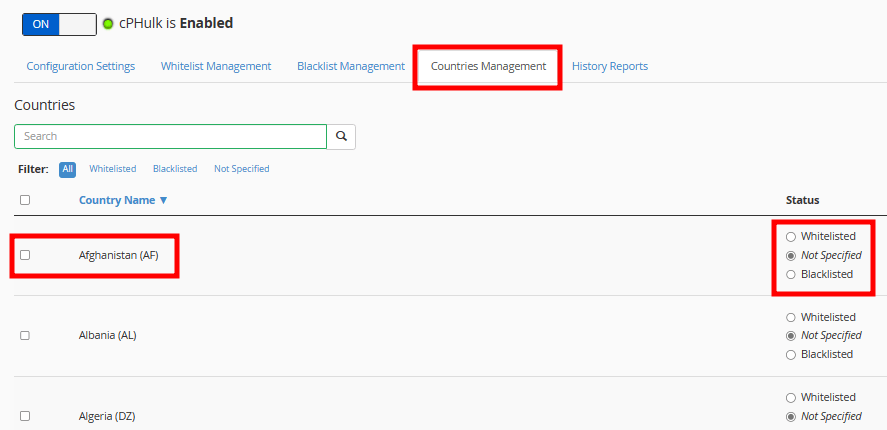
Once done, the selected countries are denied access to your Email, FTP, and cPanel.
Block Access Using CSF Firewall
We assume you have already installed CSF. Below are the steps to block traffic by country using the CSF firewall.
- Login to WHM Panel as the root user.
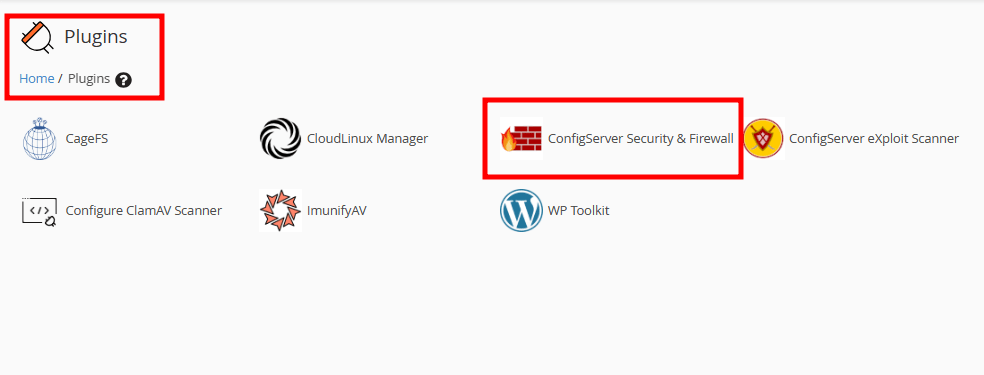
- Under the Plugins section, select ConfigServer Security & Firewall..
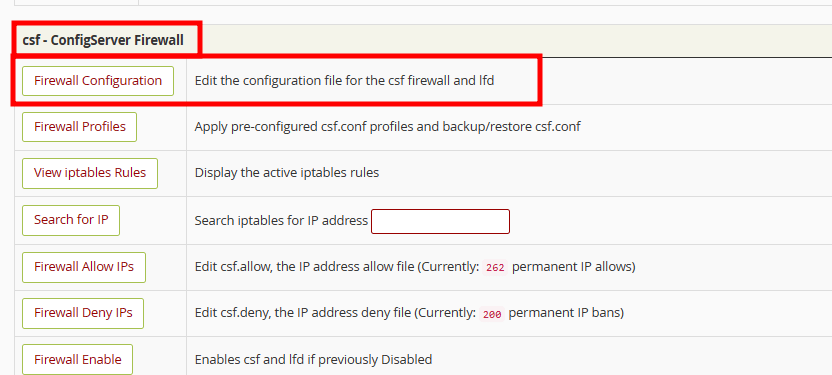
- On the new page, click the Firewall Configuration option under csf-ConfigServer Firewall section.
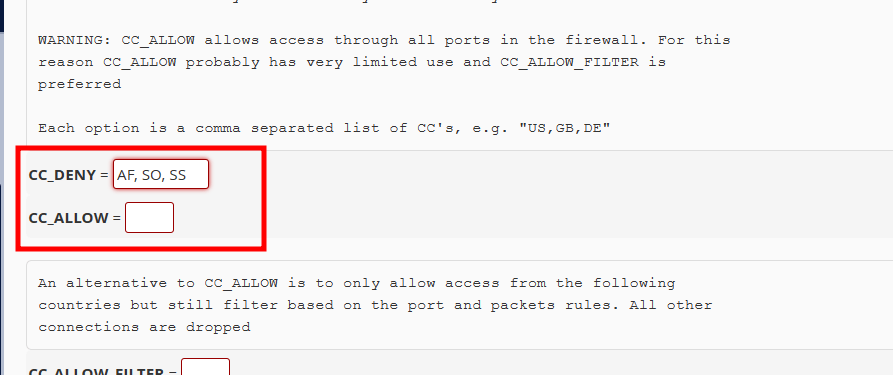
- On the Firewall Configuration page, go to the Country Code Lists and Settings section. Here, you will find below two options: CC_DENY and CC_ALLOW. Input the two-alphabet country code in the CC_DENY field to block access from that country.
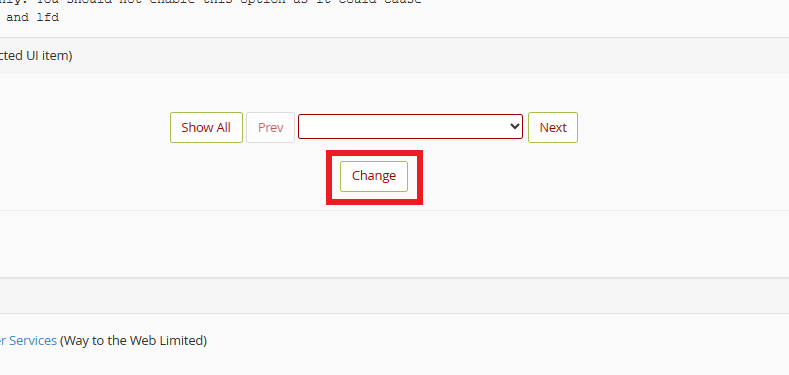
- Click the Change button at the bottom of the page, shown in the image below.
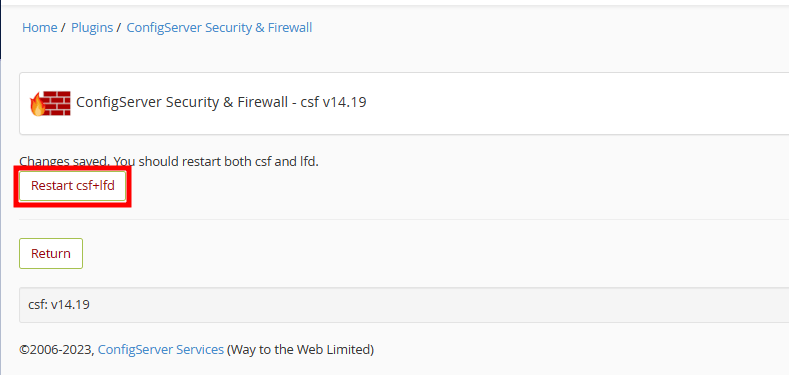
- You will see a message saying your changes are saved. Now, you need to restart the firewall with the updated settings. Click on the Restart csf+lfd button as displayed on the following screenshot.
Note: You can add multiple countries separated by a comma with no intervening spaces. For example, US, GB, DE deny access to your desired countries.
That’s It! The countries are blocked.

How To Set Index Page From cPanel Via .htaccess?

How To Upgrade the PHP Version In WHM Server?

How To Enable Leech Protection In cPanel?
About Author
KemuHost Team
We are a team of Web Hosting Experts with decades of experience in Server Management and Web Hosting fields. We do perform thorough research on the web hosting trends and provide the best information to our users.