How To Increase Diskspace For A cPanel Account From WHM?
This article will allow you to change an account’s disk space quota. This quota specifies the maximum amount of disk space a cPanel account can use on your server, which includes files like Web content, Database and email space used by the account. You can refer below steps to increase diskspace for cPanel account.
- Log in to the WHM Panel as the root user.
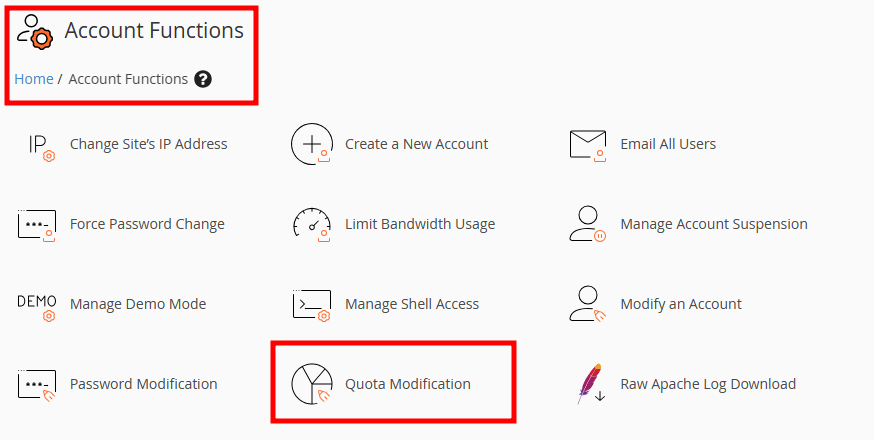
- Under the Account Function section, go to Quota Modification.
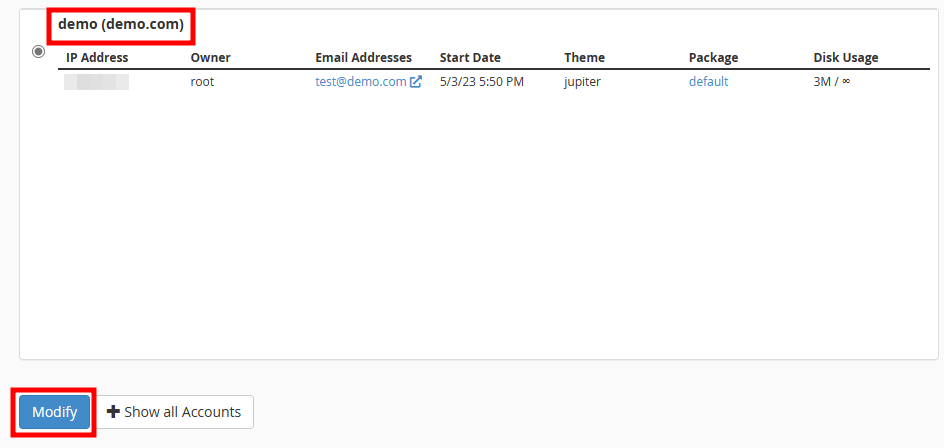
- Under Quota Modification, select the cPanel account, or you can also search it on the top search bar and click the Modify button.
- Change the disk quota as per your requirement and click the Save button.
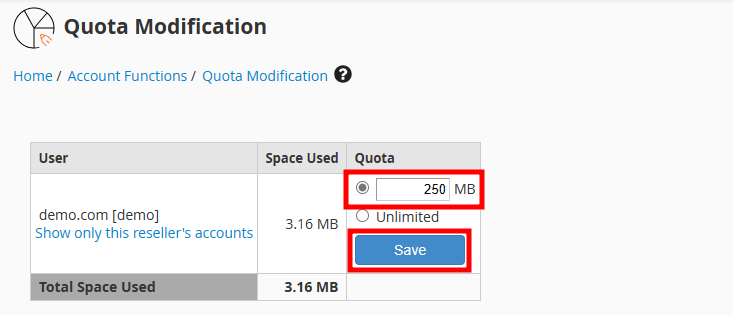
- That’s it. cPanel account disk quota is increased.
Note: Always set appropriate quotas for each account on your server. For example, users who need to host video content need more disk space than a user who only hosts a blog. Assess your account disk space usage and increase diskspace for cPanel account as required.

How To Control Outgoing Emails In WHM?

How To Use SFTP To Connect A cPanel Account?

How To Restart Apache Service From WHM?
About Author
KemuHost Team
We are a team of Web Hosting Experts with decades of experience in Server Management and Web Hosting fields. We do perform thorough research on the web hosting trends and provide the best information to our users.