How To Setup Private Nameservers In WHM Server?
Private nameservers are also known as custom nameservers or Child nameservers. It resolves the domain name into an IP address and directs the traffic to the appropriate server. The setup of Private Nameservers in WHM is done in a few clicks.
The private nameservers must be registered at the domain registrar and linked with the server’s IP address before configuring it in the WHM panel.
For instance, if you’re configuring ns1.demovps.com and ns2.demovps.com as your private nameservers, and let’s say you purchased the domain demovps.com from Kemuhost, you can easily register and set private name servers from your Kemuhost account client area.
If you have registered your domain elsewhere, you can obtain detailed instructions by contacting your domain registrar support team.
Steps to setup Private Nameservers in WHM Server.
- Log in to your WHM server as the root user.
- Under Server Configuration, click on Basic WebHost Manager® Setup.
- Click on Import on the top menu bar.
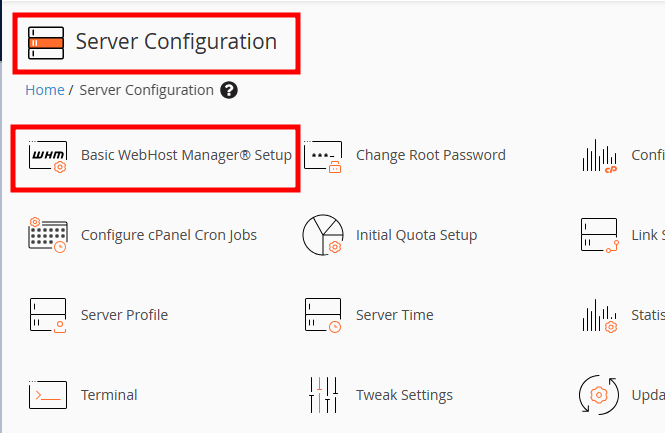
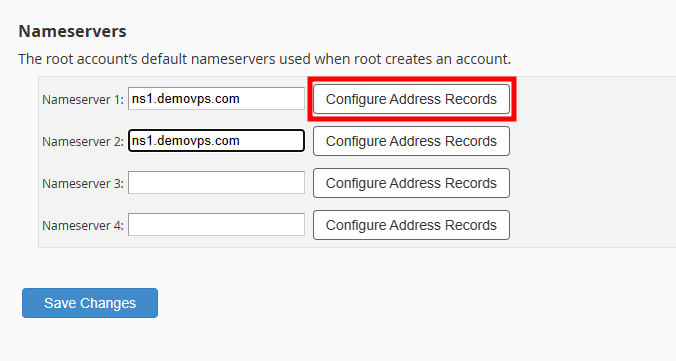
- Scroll down the Basic WebHost Manager® Setup page and go to the Nameservers section.
In this article, we are configuring the following nameservers.
ns1.demovps.com 85.XXX.XXX.XXX
ns2.demovps.com 85.XXX.XXX.XXX - In this section, you’ll find fields to enter your nameserver information.
- Next to the Nameserver1 field, enter the first nameserver’s records and click on Configure Address Records.
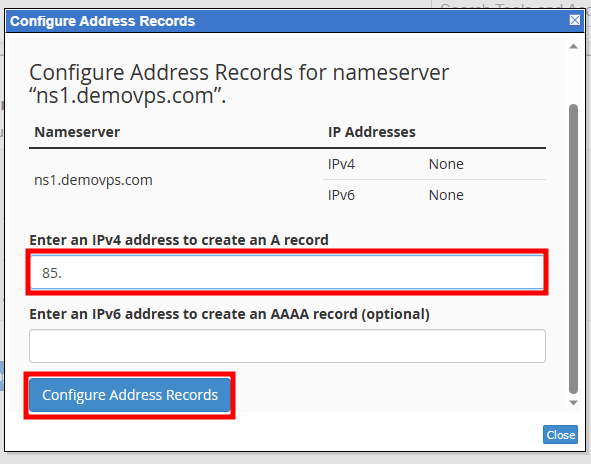
- Enter the IPv4 address of your server for the first Nameserver record in the Configure Address Records box and click the Configure Address Records button.
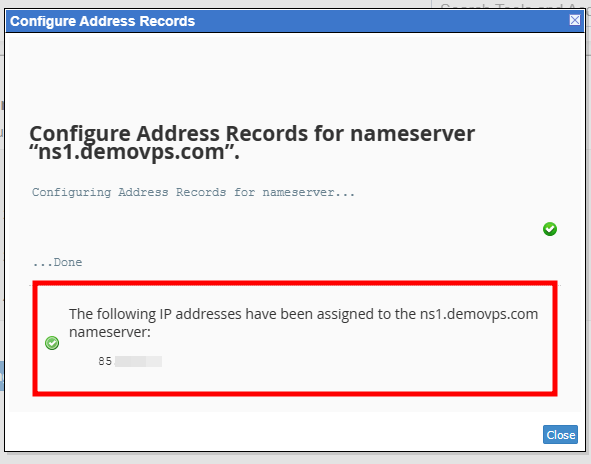
- Next to the Nameserver1 field, enter the first nameserver’s records and click on Configure Address Records.
- Perform the same steps to set up a second nameserver. If your server has multiple IP addresses, you can use a different IP address for ns2.demovps.com.
- Once both the nameservers have been configured, click the Save Changes button.
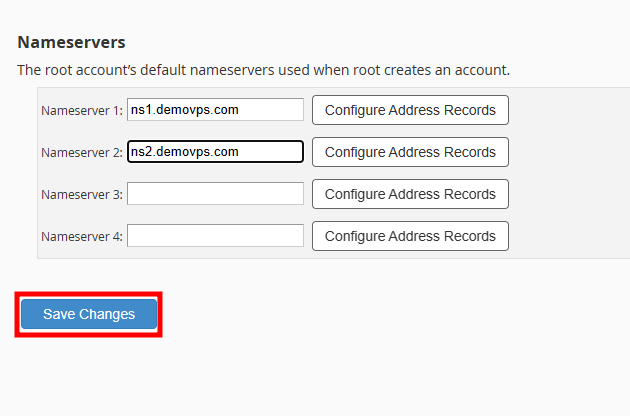
That’s all. Private Nameservers are set in WHM Server.


